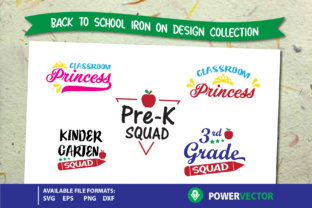
Crafting Personalized School Gear with the Back to School Iron on Design Collection
Every academic year brings the same familiar scramble — new notebooks, fresh backpacks, and the search for something that sets a student apart from the crowd. The Back to School Iron on Design Collection has become a quiet favorite among those who prefer handmade over store-bought. Whether it is a lunch bag, a pencil case, or a simple T-shirt, applying a custom iron-on design transforms an ordinary object into something that reflects personality and effort. What makes this collection particularly useful is not just the artwork itself, but the thoughtful file structure that comes with it — a structure that works seamlessly across different cutting machines and software environments.
Understanding the File Kit and Its Practical Benefits
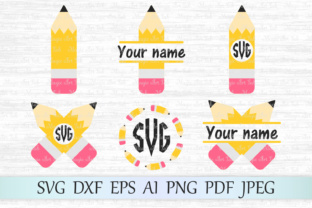
A single ZIP file arrives, and inside are four neatly organized folders. Each folder contains a different format: SVG, DXF, EPS, and PNG. For someone who has spent hours converting files or wrestling with incompatible formats, this arrangement alone saves time and frustration. The Back to School Iron on Design Collection ensures that whether you use a Cricut, a Silhouette Cameo, or even a less common machine, you have the right vector file ready to go.
The SVG files are vector-based and scale to any size without losing sharpness — crucial when you need a design to fit a small zipper pouch one day and a large tote bag the next. DXF files serve those who work with Silhouette Studio Free Edition, a popular choice for hobbyists who prefer not to upgrade to the paid version. EPS files bridge the gap for users of Adobe Illustrator, CorelDraw, or Inkscape, offering maximum flexibility for those who like to tweak colors or adjust layers before cutting. And the PNG files, with 300 dpi resolution and transparent backgrounds, are perfect for quick previews or for those rare occasions when a raster image is more convenient than a vector.
Matching Files to Your Cutting Workflow
Different cutting machines have different native languages. Cricut Design Space, for instance, handles SVG files smoothly, while Silhouette Studio Free Edition relies on DXF for vector imports. The Back to School Iron on Design Collection eliminates the usual friction of format hunting. A user can unzip the folder, open the SVG folder if they own a Cricut, or the DXF folder if they are on a free Silhouette setup, and begin cutting within minutes.
For those who use the Silhouette Studio Designer Edition, the SVG files unlock additional editing capabilities, such as welding and compound path adjustments. EPS files, meanwhile, are often overlooked by casual users but are invaluable for professional designers who want to open the artwork in Adobe Illustrator, adjust anchor points, and then export back to a cutting-friendly format. The collection essentially supports the full spectrum of users — from the parent making a single shirt for a child to the small business owner producing dozens of identical designs for a local school fundraiser.
Working with Vinyl and Heat Transfer
Iron-on vinyl, also known as heat transfer vinyl (HTV), works best when the design has clean lines and no overly thin details that might tear during weeding. The Back to School Iron on Design Collection has been created with this in mind. The vectors are built to cut cleanly on a standard mat, and the internal contours are wide enough to allow for smooth weeding even for beginners. When you are removing excess vinyl from around a school bus or a stack of books, you want the design to hold together without fragile sections that lift off accidentally.
The transparency of the PNG files also helps during placement. Before cutting, you can print the PNG, cut it out roughly, and position it on the garment to check scale and alignment. This simple step prevents mistakes that waste vinyl and time. For a back-to-school project where you might be making multiple shirts for different grade levels, being able to preview placement is a real advantage.
Versatile Use Cases Beyond the Classroom
While the collection is called "Back to School," its application stretches far beyond September. Teachers use these designs to label classroom supplies, create matching team shirts for after-school clubs, and personalize storage bins. Parents find them useful for camp gear, sports uniforms, and even Halloween costume details. The same school bus design that goes on a first-day shirt can just as easily decorate a teacher's tote or a volunteer's apron.
Small business owners who sell personalized items on Etsy or at local craft fairs often look for themes that are seasonal but not narrow. A design collection that works for back-to-school also works for teacher appreciation week, graduation, or summer camp. The scalability of the vector files means you can produce small iron-on patches for hats or large designs for hoodies, all from the same source file.
Real-World Application: A Classroom Set in One Afternoon
Consider a scenario where a parent volunteer needs to create 20 identical pencil case labels for a kindergarten class. Using the Back to School Iron on Design Collection, they open the SVG folder, import the chosen design into Cricut Design Space, resize it to a uniform 3 inches, and duplicate it across the mat. The cutting takes about fifteen minutes. Weeding each piece is straightforward because the shapes are not overly intricate. After pressing the labels onto a roll of iron-on fabric, the entire set is ready in under two hours. This kind of efficiency matters when you are balancing volunteer work with other responsibilities.
Technical Considerations for Optimal Results
Even with a well-prepared collection, the final result depends on how you handle the material and machine settings. The Back to School Iron on Design Collection is format-ready, but you still need to adjust your cutting machine to the specific brand and thickness of vinyl you are using. A common mistake is to leave the default blade depth and pressure, which can either cut through the backing paper or fail to cut through the vinyl layer entirely.
For standard iron-on vinyl, a cut setting of medium pressure and a blade depth around 2 or 3 (depending on your machine) usually works well. If you are using glitter or flocked HTV, which is thicker, you may need to increase the pressure slightly. Always do a small test cut first — the collection's PNG files are helpful here because you can print the test design at the exact size and check your cut alignment before committing to a full sheet of vinyl.
Another consideration is mirroring. When you cut iron-on vinyl, the design must be mirrored before cutting so that it reads correctly when transferred to the fabric. Most cutting software has a mirror toggle, but it is easy to forget. The vector files themselves do not come pre-mirrored, which is standard, so you need to activate that option in your software. Forgetting to mirror is the single most common error in iron-on projects, and it wastes both material and time.
Heat Press vs. Household Iron
A dedicated heat press gives more consistent temperature and pressure, but not everyone has access to one. A regular household iron works perfectly well for most projects using the Back to School Iron on Design Collection. The key is to use firm, even pressure and to avoid sliding the iron around, which can shift the design. Press down for 10-15 seconds per section, lift straight up, and repeat until the entire design has been applied. For larger designs, working in sections ensures even adhesion without burning the vinyl.
If you are using a heat press, set the temperature according to your vinyl manufacturer's instructions — typically around 300-320°F for standard HTV. The designs in this collection, because they are vector and have no raster artifacts, transfer cleanly without jagged edges. The 300 dpi PNG files, while not needed for cutting, are excellent for creating mockups to show customers or to preview the final look on a photograph of a shirt or bag.
Long-Term Durability and Care
An iron-on design that cracks or peels after a few washes defeats the purpose of making something personal. The Back to School Iron on Design Collection itself does not determine durability — that depends on the vinyl quality and application technique — but the design structure plays a role. Designs with large solid areas tend to last longer than those with many small isolated pieces, because fewer edges are exposed to abrasion. The collection includes a mix of both styles, so you can choose a chunky design for items that will be washed frequently, like a lunch bag, and a more detailed one for occasional wear, like a hoodie.
Washing clothes inside out in cold water and avoiding fabric softener will extend the life of any iron-on transfer. Tumble drying on low heat or air drying is gentler than high heat cycles. For laminated vinyl or specialty textures like holographic, extra care is needed. The transparency of the PNG format again helps here: you can print a care instruction label using the same design theme and iron it onto the inside of the garment, creating a professional finish that also informs the user how to maintain the item.
Adapting the Collection for Different Skill Levels
New users sometimes feel intimidated by vector files and cutting software. The Back to School Iron on Design Collection lowers that barrier by providing multiple format options. A beginner can start with the DXF files in Silhouette Studio Free Edition, which has a simpler interface than the Designer Edition. As their skills grow, they can move to SVG for advanced editing features, or EPS if they want to use professional illustration software.
Educators who teach design or crafting classes find this format diversity useful too. They can give the same ZIP file to students using different operating systems and software, and every student can open at least one of the included formats. The PNG files serve as a fallback for those who do not yet have a cutting machine but want to practice placement and scaling on paper first.
File Organization and Storage
The four-folder structure inside the ZIP file is intuitive enough that most users will not need to reorganize. However, for those building a library of designs over multiple seasons, it helps to rename the folders with a consistent naming convention — for example, including the year or the theme ID. Because each file has the same design name across all formats, it is easy to find the SVG version of a particular motif even if you have hundreds of files.
Backing up the collection is straightforward. The files are relatively small, so they can be stored on a cloud drive, an external hard drive, or even emailed as needed. For a small business, keeping the original ZIP file intact and extracting copies for each project prevents accidental overwriting of the source files. The Back to School Iron on Design Collection is designed as a reusable resource, not a one-time-use set, so preserving the integrity of the original files matters.
Enhancing Projects with Layering and Color Separation
While the collection ships with single-color ready designs, many users like to layer different colors of vinyl to create multi-color effects. Because the files are vector, you can open them in Adobe Illustrator or Inkscape, separate elements into distinct layers, and assign different colors to each layer. For instance, a design of a school bus might be separated into a yellow body layer, a gray window layer, and black wheel layer. Each layer is then cut from a different color of vinyl and applied sequentially.
This technique elevates a simple iron-on project into something that looks almost screen-printed. The Back to School Iron on Design Collection supports this workflow because the vectors are clean and the paths are closed, making selection and separation straightforward. For users who do not have vector editing software, the PNG files can be used as a reference to manually cut separate layers, although this is less precise and more time-consuming.
Another approach is to use the design as a stencil for fabric paint or bleach etching. The SVG and DXF files can be cut from stencil material rather than iron-on vinyl, applied to fabric, and then painted over. After removing the stencil, the design remains as a painted or bleached image. This technique works especially well for denim jackets and canvas bags. The same design collection thus serves multiple decorating methods, not just iron-on.
Selecting the Right Design for the Right Item
Not every design suits every surface. A large, detailed motif that looks great on a T-shirt might overwhelm a small pencil pouch. The Back to School Iron on Design Collection includes designs of varying complexity, so you can match the scale and detail to the item. For a lunch box, choose a compact, bold shape that will not get lost in the curved surface. For a backpack, a larger design with some negative space works well because it can be seen from a distance.
The PNG files, which are about 6 inches at the widest point, give you a clear idea of the design's proportions. If you need to shrink a design significantly, check that the thinnest lines remain visible after scaling. The vector files handle scaling without quality loss, but the physical limitations of vinyl cutting mean that very thin lines below 1/16 inch may tear during weeding. Staying within a reasonable scale range — typically between 2 and 8 inches — yields the best results for most iron-on projects.
Ultimately, the Back to School Iron on Design Collection serves its purpose because it respects the diversity of both users and machines. The format variety, the clean vector construction, and the practical sizing all point toward a tool that is meant to be used, not just collected. Whether you are a parent preparing for the first day of school, a teacher organizing a classroom, or a creator building a small business, the collection adapts to your workflow rather than forcing you to adapt to it. And that is the kind of tool worth keeping for many semesters to come.