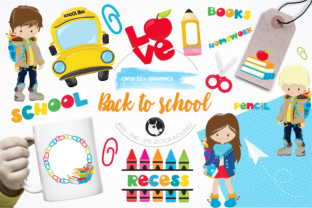
Back to School Graphics: Smart Choices for Designers, Educators, and Small Business Owners
Seasonal design projects come with a particular kind of pressure. You need visuals that connect, that feel timely without looking rushed, and that work across multiple formats. Whether you are creating classroom materials, social media posts, a school newsletter, or promotional content for a small business, the right graphic assets make all the difference. A well-prepared set like the Back to School collection from prettygrafik Design inc. offers a strong foundation. But owning good files is only the first step. How you choose, prepare, and apply these elements determines whether your final project looks polished or feels like an afterthought.
Many people assume that buying a graphic bundle guarantees great results. The truth is more subtle. Without a little forethought, even high-quality vectors and high-resolution PNGs can lead to frustration, extra work, or disappointing output. This article walks through the most common mistakes people make with Back to School graphics, explains why those missteps hurt your results, and shows you how to avoid them.
Mistake One: Not Understanding What You Actually Received
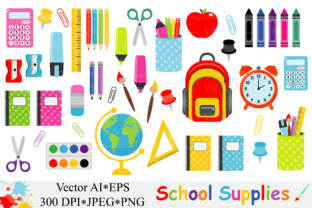
The Back to School bundle includes an EPS vector file, individual PNG files with transparent backgrounds at 300 dpi, and individual JPEG files with white backgrounds at the same resolution. Each graphic is sized at 6 x 6 inches. This sounds straightforward, but people frequently misunderstand what each format is for.
A common error is opening the JPEG or PNG and trying to scale it up beyond its native size. At 300 dpi and 6 inches, these files are perfectly fine for most print and digital uses. But if you attempt to enlarge them significantly, you will see pixelation. That is not a flaw in the design. It is a format limitation. The EPS vector file is the one you want for extreme scaling, color adjustments, or custom edits.
Another overlooked detail is the white background on the JPEG files. Those are meant for layouts where you need a clean white backing, such as flyers or handouts you plan to print on white paper. If you try to place a JPEG with a white background onto a colored or textured backdrop, you will get an ugly white box around your graphic. That is where the PNG files shine, because their transparent background lets you layer them seamlessly.
Better approach: Before you start any project, open the EPS in a vector editing program like Adobe Illustrator or Affinity Designer. Familiarize yourself with the individual elements. Then, for each specific use case, choose the appropriate format. Need to resize a school bus icon to fit a banner? Use the EPS. Want to drop an apple illustration onto a gradient social media post? Grab the PNG. Printing a simple flyer on white card stock? The JPEG will save you a step.
Mistake Two: Editing Raster Files When You Should Use the Vector
This is one of the most time-wasting errors I see. Someone opens the PNG file of a backpack illustration, wants to change its color from red to blue, and spends twenty minutes trying to do it in Photoshop with careful selection tools and layer adjustments. The result is rarely perfect. Edges look rough. The transparency gets compromised. And the whole process is frustrating.
The EPS vector file exists precisely to avoid this. Vectors are made of paths, not pixels. You can change colors, resize, rotate, and reposition individual elements with a few clicks. You can also separate the graphic into its component parts if the design allows it. For example, you might want to use only the apple from a larger composition, or flip the orientation of a pencil without affecting the rest of the image.
Better approach: Always start with the EPS for any customization. Even if you only need a minor tweak, working in vector format preserves quality and gives you far more control. After you finish your edits, you can export a PNG or JPEG at the correct size and resolution for your final use. This workflow saves time and produces cleaner results.
Mistake Three: Overlooking the 300 DPI Requirement for Print
The Back to School files come at 300 dpi, which is the standard for professional print. But I have seen people take these perfectly good print-ready files, resize them in a word processor or basic photo editor, and accidentally reduce the resolution to 72 dpi. The result looks sharp on screen but prints blurry and disappointing.
This happens most often with teachers or small business owners who are not familiar with resolution settings. They might drag a PNG into Microsoft Word, stretch it to fill a page, and assume the print quality will be fine. It will not. The software has downsampled the image to fit the screen view, and the print output suffers.
Better approach: If you are printing, use a layout program that respects DPI settings, such as Adobe InDesign, Canva (with proper export settings), or even PowerPoint if you adjust the image sizing carefully. Keep the graphic at 100% or scale it down, never up. And always export your final file at 300 dpi. If you are unsure, print a test page on plain paper before committing to your final run.
Mistake Four: Using the Wrong File Type for Digital Projects
The flip side of the print problem is using print-optimized files for digital projects without considering file size. The 300 dpi PNG files are large. That is good for print, but not ideal for websites, email newsletters, or social media. A single 6 x 6 inch PNG at 300 dpi can be several megabytes. Uploading that to a web page will slow load times and hurt user experience.
Better approach: For digital use, create a resized copy of the PNG at 150 dpi or 72 dpi, depending on the platform. Most social media sites compress images anyway, so starting with a smaller, optimized file gives you more control over the final appearance. Keep the original high-resolution PNG for archival purposes, and export smaller versions as needed. The EPS vector is also worth considering for web graphics because you can export crisp SVG files that scale perfectly on retina displays.
Mistake Five: Ignoring Licensing and Attribution Requirements
The Back to School collection is copyrighted by prettygrafik Design inc. That means you have permission to use the graphics, but you may not have permission to resell them as standalone files or claim them as your own original work. People sometimes assume that buying a graphic set gives them unlimited rights. That is not always the case.
Better approach: Read the license agreement that comes with your purchase. Most standard graphic licenses allow you to use the designs in commercial projects, such as flyers for your business or products you sell, as long as the graphics are part of a larger design. You usually cannot redistribute the raw files or sell them on a marketplace. If you are unsure about a specific use case, contact the designer. A quick question can save you from a legal headache later.
Mistake Six: Neglecting to Organize Your Files Before You Start
When you download the Back to School bundle, you get an EPS file plus dozens of PNG and JPEG files all named with similar conventions. Without a system, you will waste time hunting for the exact graphic you need. I have watched people scroll through a long list of thumbnails, opening file after file, getting distracted and frustrated.
Better approach: Create a folder structure that matches your workflow. For example, sort graphics by theme: school supplies, transportation, stationery, and so on. Rename files with descriptive names if the original names are cryptic. Keep the EPS file in a separate "vectors" folder. If you use a digital asset management tool like Eagle or even a well-organized Google Drive, you can tag files for quick searching. This upfront organization pays for itself the first time you need to find a specific graphic under a deadline.
Mistake Seven: Relying on the Graphics to Do All the Work
This is less a technical error and more a design mistake. People sometimes take a beautiful Back to School graphic, drop it onto a blank page, and call it done. The result looks incomplete or cluttered because there is no supporting layout, typography, or visual hierarchy.
Graphics are tools, not solutions. A high-quality apple or pencil illustration works best when paired with clean fonts, adequate white space, and a clear message. If you place too many elements together without balancing them, the design feels chaotic rather than inviting.
Better approach: Use the graphics as accents or focal points. Let one illustration lead the composition. Pair it with a short, bold headline and a simple background. If you need multiple graphics, group them intentionally and leave breathing room around each one. Study well-designed school flyers or social posts and notice how they use imagery sparingly. Less is often more, especially with detailed or colorful illustrations.
Mistake Eight: Forgetting to Check Color Consistency Across Projects
The Back to School graphics are designed with a consistent palette, but when you place them into different software or print on various materials, colors can shift. A cheerful red school bus in your EPS file might look slightly orange after you export it as a JPEG and print it on a home printer. The screen you used to edit the graphic may also show colors differently than another monitor.
Better approach: If color accuracy matters for your project, work in a color-managed environment. Use CMYK mode if your final output is print, and keep the EPS as your master file so you can adjust colors globally. For digital projects, sRGB is the safest choice. Test your colors by printing a small sample or viewing your design on multiple screens. Small adjustments early in the process prevent disappointment later.
What to Check Before You Buy or Use a Back to School Graphic Set
Before you commit to a purchase or start a major project, ask yourself a few questions. Does the set include the specific elements you need, or will you have to supplement with other graphics? The bundle from prettygrafik Design inc. offers a wide range of school-themed illustrations, but you should verify that apples, pencils, buses, books, and other motifs are present. Look at the preview images carefully. Check whether the style matches your brand or project tone. A whimsical, hand-drawn style might not suit a corporate training manual, while a minimalist vector style could feel too cold for a kindergarten classroom flyer.
Also confirm your technical capability. Do you have software that can open EPS files? If not, you will rely entirely on the PNG and JPEG versions, which limits your editing options. If you plan to scale the graphics significantly or change their colors, the vector format is essential.
Finally, consider the long-term value. High-quality, well-organized graphic sets save you time across multiple seasons and projects. A single purchase can support years of back-to-school content, from classroom decor to social media campaigns to printed handouts. That is the real return on investment.
Choosing and using Back to School graphics well is not complicated, but it does require attention to format, resolution, color, and intent. When you understand what each file type is for, edit in the right program, and plan your layout with care, the results speak for themselves. Your projects look professional. You waste less time. And the graphics you purchased end up earning their place in your toolkit, season after season.